Git and GitHub
RStudio can be used to efficiently make a package in R, and allows an accessible way of implementing version control and git integration. As an example of these processes, I have created an R package which implements a basic form of least squares regression. The following function obtains parameter estimates given a dataset and formula:
LS.model = function(formula, data){
  ys = all.vars(formula)[1]
  y = data[,ys]
  X = model.matrix(formula, data)
  wLS =  solve(t(X) %*% X) %*% t(X) %*% y
  return(list(Parameters = wLS, df = X, y = y))
}
Other functions in the package include LS.predict to get predictions and LS.plot to plot the predicting function on top of the data.
LS.predict = function(model, newdata=NULL){
  if(is.null(newdata)) return(model$df %*% model$Parameters)
  if(!is.null(newdata)) {
    nd = cbind(1,newdata)
    return((nd) %*% model$Parameters)
    }
}

LS.plot = function(model, var = NULL, ...){
  X = model$df
  y = model$y
  d = dim(X)
  if(is.null(var)){
    print("var not specified, taking first input value")
    names = colnames(X)[colnames(X)!="(Intercept)"]
    var = names[1]
  }
  preds = LS.predict(model)
  o = order(preds)
  plot(X[,var], y, xlab = var, ...)
  lines(X[o,var], preds[o], col="red", lwd=2)
}
Least Squares Example
To see the usage of this package, see the following example using the prostate cancer dataset from the lasso2 package. Firstly, starting by fitting the model:
library(lasso2)
data(Prostate)
fit = LS.model(lpsa ~ lcavol, data = Prostate)
The output fit can be passed into LS.plot and LS.predict.
head(LS.predict(fit))## [,1]
## 1 1.0902222
## 2 0.7921115
## 3 1.1398502
## 4 0.6412553
## 5 2.0478064
## 6 0.7521390LS.plot(fit, var="lcavol")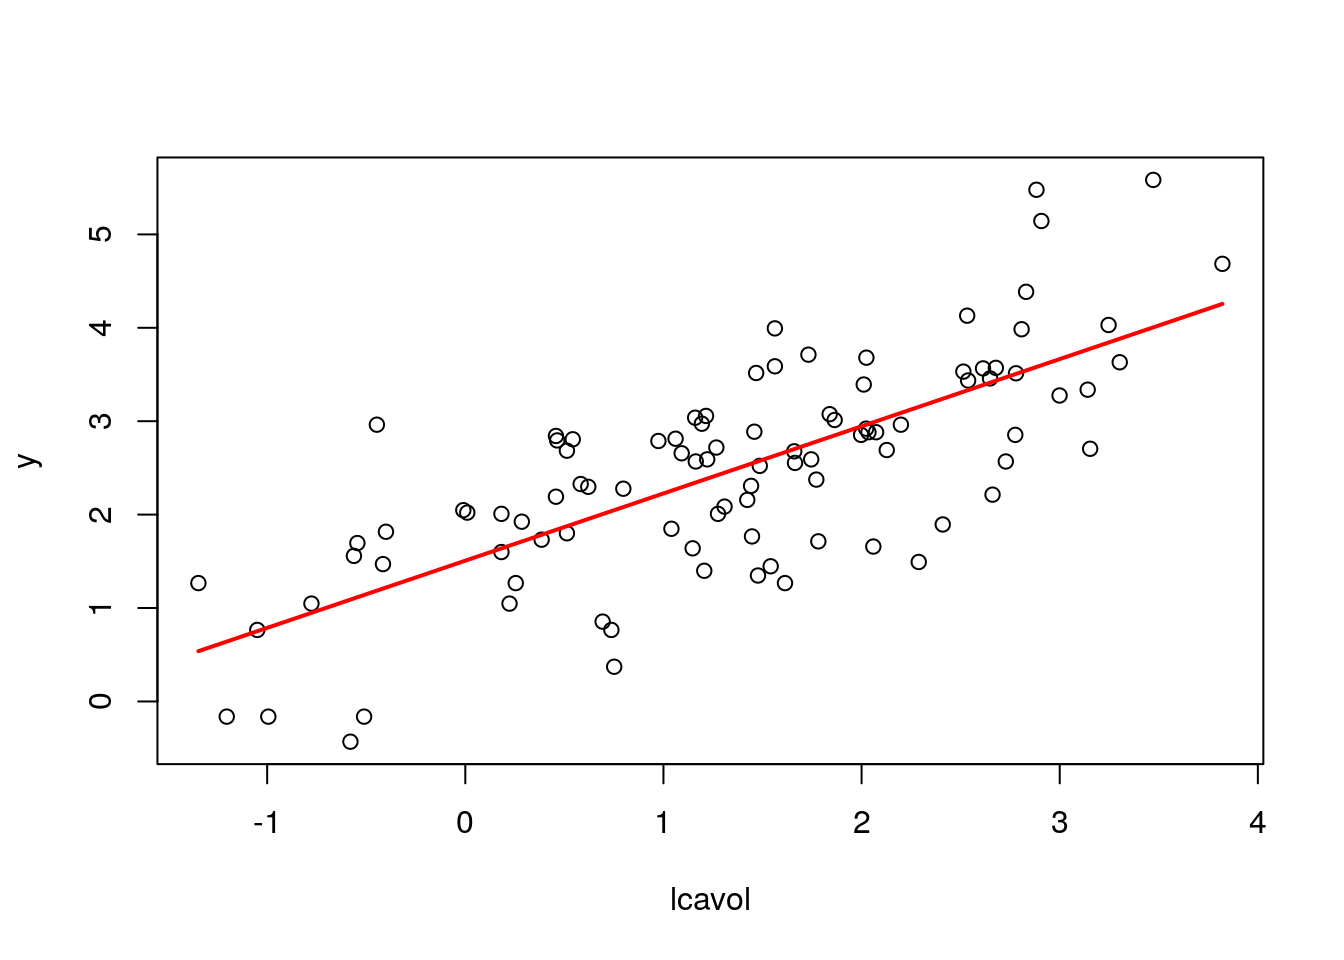
Creating the Package
RStudio allows the creation of a package to be relatively straightforward, with an option to create a template for an R package. The package structure consists of:
DESCRIPTION: plain text file that contains information about the title of the package, the author, version etc.LICENSE: description of copyright and licensing information for the packageNAMESPACE: describes imports and exports, for example you can import another package if you are using it for your own packageRfolder: folder which contains all the code for the packagemanfolder: contains documentation files to describe your functionstestfolder: contains testing functions for testing the packages
Documentation
After installing the devtools package, the roxygen package can be used to automatically generate a documentation structure and populate the NAMESPACE file. In RStudio, you can go to Code -> Insert Roxygen skeleton when the cursor is inside a function to create the documentation skeleton for each function, and manually fill it in to describe the inputs, outputs, descriptions etc. of the function. Within this structure, fields are defined by the @ symbol, so for example @param will define the input parameter of the model. As well as this, you can use @import <package_name> to get Roxygen to add a particular package to the NAMESPACE file. For example, the roxygen structure for LS.model is:
#' Least Squares Regression
#'
#' @param formula an object of class "formula"
#' @param data data frame to which the formula relates
#' @return list containing three elements: Parameters, df, y
#' @import stats
#' @examples
#' df = data.frame(y = c(1,2,3,4), x = c(2,5,3,1))
#' LS.model(y~x, data=df)
The documentation can be generated by running the command devtools::document() (or pressing Ctrl + Shift + D in RStudio).
Testing
In most cases, testing is done manually. After creating a function, you can put a certain amount of inputs in, and make sure that the outputs match up with what you were expecting. This can be automated with the testthat package. This allows testing to be consistent throughout code changes, so if you change some code, you can run the test again to see if the outputs match with what you were expecting, without having to manually test again. The command usethis::use_test("<name>") can be used to populate the tests directory, where the testing functions are stored.
For the LS.model function, some useful tests were to ensure that the output dimension \(n\) matched the input dimension. Using the test_that and expect_equal function achieved this functionality:
library(testthat)
test_that("output dimension (n)", {
  df = data.frame(y=c(1,2,3,4),x=c(4,5,6,7))
  m = LS.model(y~x,data=df)
  expect_equal(dim(as.matrix(df))[1], 4)
})
Other tests were also implemented for checking this function as well as the other functions. You can run all the tests by running devtools:test() (or Ctrl + Shift + T in RStudio):
> devtools::test()

Loading simpleLS
Testing simpleLS
✔ |  OK F W S | Context
✔ |   4       | LS.model
✔ |   2       | LSr

══ Results ═══════════════════════════════════════════════════════════
Duration: 0.2 s

OK:       6
Failed:   0
Warnings: 0
Skipped:  0
This shows the tests that were passed, and can show the tests that were unsuccessful. If tests do not pass, then details will be given why, so that you know where something has gone wrong.
Coverage
Another useful functionality is to test how much your tests actually test. The coverage of your tests (as a percentage) will tell you how much code is not being tested, so generally higher coverage is better. This can be implemented with the covr package. Running covr::report() will generate a report. For this package, this received
simpleLS coverage - 95.45%Git Integration
Git and Github allow easy access to version control, and online storage and supply of an R package. By initialising a repository for the package directory, and allowing access to it on Github, your code and package is freely available online. ‘Committing’ and then ‘pushing’ your changes and files to your repository will update your package to the latest version, and you are able to view older versions of code and previous changes you made in case something goes wrong. This is very useful in software development, for example if you want to revert to the last stable version.
The repository for this package can be found at:
https://github.com/DanielWilliamsS/simpleLSTravis CI integration
A publicly available R package can be tested online using a tool known as Travis CI (CI - Continuous Integration). When a pull request is made, or new changes are pushed to the Github repository, Travis CI will automatically test the code using the testing functions described previously. This allows someone who downloads the package to be sure that the code works, and provides a way of automatically testing new versions of code. This is especially useful in collaborative coding projects.
Environmental variables can be included in the Travis CI settings, which allows Travis to do other things. For example, one environmental variable will test the coverage of the code testing, as described previously. Another environmental variable can enable Travis to build RMarkdown pages and deploy them to a Github pages website, allowing you to publish your html RMarkdown document online.